
Following on from my last blog post about how we researched our heat pump. We’ve just finished having the unit, new equipment, electrics and plumbing done. Our home has been upgraded with a heat pump.
It’s exciting to finally have one in our garden after months of researching it. There’s lots of information online about how heat pumps work but not quite so much on how the install goes and what’s involved in that step by step. So here’s a breakdown to everything that happened and what to expect.
How it went
This is just my experience of installation, your home and therefore your setup and experience may be entirely different, but I really wanted to provide a bit more detail around what actually happened on each of the days.
We worked from home for the duration of the project. There was loud drilling and sawing for short periods of time on each day. Mostly because new pipes and power lines were drilled from the external house wall into our boiler cupboard area and near the fusebox.
The workmen worked quickly, put protective sheets down on our carpets, took off their shoes and made sure our indoor cats didn’t escape!
We had a really positive experience with the installation overall.
What to expect
- We were advised there would be 5 days for work, but it ended up taking 6 (as the electrician wasn’t available to wrap up the project until the following week)
- We were without hot water for around 3 days. This was while the old water storage tank was removed and the new tank (with immersion heater) was installed
- We had about a half day without cold water while our old water storage tanks in the attic were removed and new water storage and expanders were installed
- We were without heating for the duration of the project (for about a month beforehand due to boiler breaking) but if this wasn’t the case, we would have been without heating for 8 days, basically from the moment the installation started (with everything disconnected) to the moment the electrician commissioned the heatpump
- There was no power in our home for about 2 hours in total on the final day while the heat pump was made live with the fuse box and other electrical work in the old boiler cupboard was done.
How to prepare for heat pump installation
We weren’t given any instructions for what to do to prepare our house, so this is what I’d suggest to do before your installer arrives.
- Inform your neighbours ahead of time about the noise and roughly when you’ll complete, especially if you have any party walls
- Completely empty your boiler cupboard, removing all shelving and any other objects, so only the plumbed units and electrical controls are in there with no other clutter
- Clear the room around where your new tanks and plumbing will be (in our case the boiler cupboard), the installers had a lot of equipment and they’ll need somewhere to leave their equipment each night
- Make clear space around where your current water storage is, or make your attic accessible as best you can as they’ll need space to work and remove these if applicable
- Make space in the garden for all the equipment, pipes and boxes that need to be delivered and obviously, clear where the heat pump needs to go.
Day 1
- Delivery of items for install (including 200 litre water cylinder, 8kW Midea heat pump, 5x radiators, 1x towel radiator among many other things)
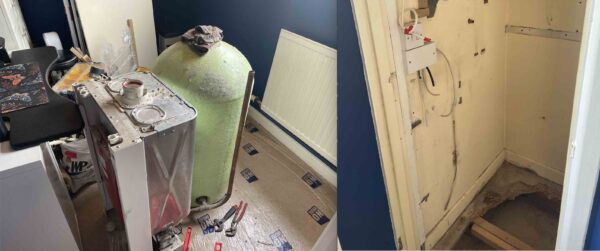
- Removal of immersion heater, old boiler, and two old water storage tanks
- Prepping the cupboard for the cylinder (new, stronger floor needed)
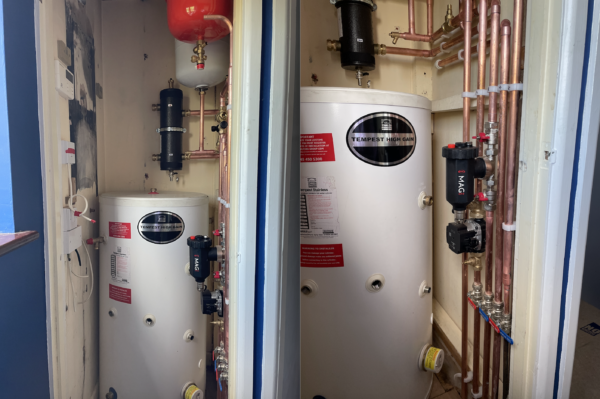
- Placement of cylinder in cupboard
- Removal of old pipes
- Loss and restoration of cold water
- Loss of hot water
- Recycling of old tanks and boiler
Day 2


- Removal of old radiators
- Hanging new (larger) radiators
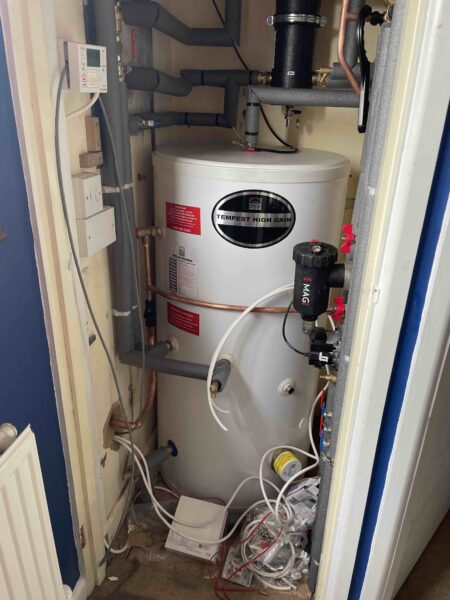
- Plumbing in cylinder, adding extra stop valves
- Installing most of the items in the old boiler cupboard
- Putting the heat pump unit in place
- Deciding on plumbing and wiring routes for heat pump
- Recycling of old radiators
Day 3
- Hanging last radiator
- Soldering all the new radiator connections
- Drilling three holes into the external wall for the heat pump connections
- Placing and soldering pipe route from outside of house into old boiler cupboard
- Restoration of hot water (from new immersion heater)
Day 4

- Moving our outdoor tap
- Putting feet on the pump to give it clearance on our drain
- Unboxing pump and placing it in our garden
- Finishing external pipework and connecting to heat pump
- System pressurised and air removed by bleeding radiators
Day 5 (half day)
- Filling in old flue hole
- Clearing rooms of tools and mess
- Adding lagging (foam wrapping) to internal and external pipes
- Registering our new water tank
Day 6 (half day)
- Electrician visit – drilled holes for power wires to heat pump
- Connected heat pump to home, from line to fuse box
- Added an outside isolator switch
- Added meter to calculate electricity usage just for heat pump
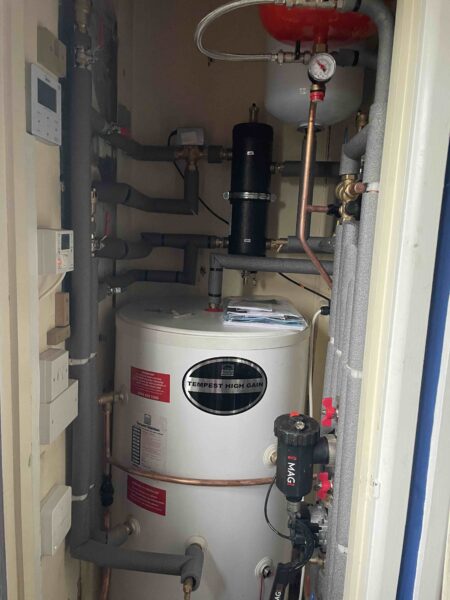
- Wired in internal controls for heat pump and immersion heater
- Installed Midea heat pump internal control and Honeywell wireless thermostat and receiver
- Loss of about power for about two hours total on and off (with warning)
- Commissioning of system and showing us how to use our three control panels (heat pump, thermostat, immersion heater)
- Handover of manuals etc.
Wrapping up
So all in all it was a really positive experience and I am looking forward to how our system does in its first year. I’ll be collecting lots of data as I go to compare how the heat pump does to our old gas boiler.
Next time: initial impressions from our first few weeks with a heat pump and what it feels and sounds like inside and outside the house. Plus some starting impressions of how it’s managing heating our water and home.